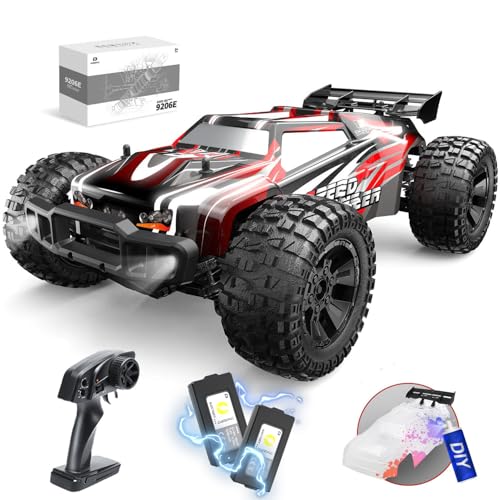
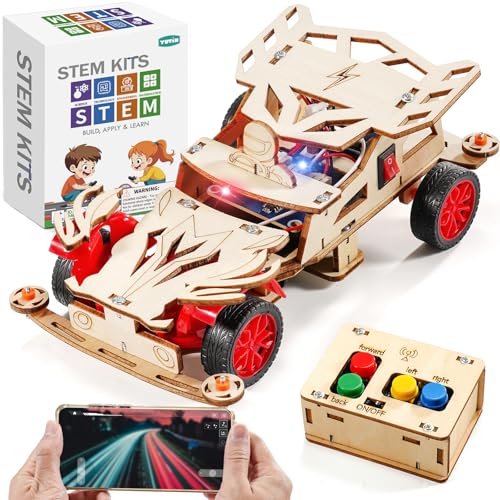
Build Your Own RC Car: The Ultimate Hobbyist Guide
Discover the joy of assembling a custom radio-controlled car from scratch. From selecting the right kit to fine-tuning performance, this complete guide walks you through every step of building your own RC car with confidence.
START YOUR BUILD🔧 Why Build Your Own RC Car? Building an RC car from a kit is far more rewarding than buying a pre-assembled model. You gain a deep understanding of how every component works, develop practical mechanical skills, and create a machine that is uniquely yours. Whether you are a parent looking for an engaging project with your child or a hobbyist seeking a new challenge, a build-your-own RC car kit offers an unmatched hands-on experience that combines engineering, craftsmanship, and pure fun.
Choosing the Right Build-Your-Own RC Car Kit
The first and most important decision in your journey is selecting the right kit. RC car kits come in a wide spectrum of complexity, from simple snap-together models designed for younger builders to advanced competition-grade chassis that require precision assembly and tuning. Understanding the differences between these tiers will help you match a kit to your experience level, available time, and long-term goals.
If you are completely new to the hobby, start with an entry-level kit. These kits typically include pre-assembled gearboxes, pre-cut bodies, and step-by-step illustrated manuals that make the process approachable and enjoyable. More experienced builders can explore mid-range and top-tier kits that offer greater customization, higher-grade materials, and the opportunity to fine-tune every aspect of the vehicle's performance.
For those interested in a broader look at RC vehicles beyond build kits, you may also explore our guide on children's RC cars for ready-to-run options, or consider the build your own RC car kit for adults if you are looking for advanced, adult-oriented projects with greater technical depth.
Kit Tiers at a Glance
To help you compare kits without getting lost in specifications, here is a tier-based breakdown that focuses on build complexity, included components, and the type of builder each tier suits best.
| Tier | Build Complexity | Typical Included Parts | Best For |
|---|---|---|---|
| Entry-Level | Low — 2 to 4 hours | Pre-assembled gearbox, basic motor, simple chassis, pre-painted body | First-time builders, younger hobbyists, family projects |
| Mid-Range | Moderate — 4 to 8 hours | Unassembled drivetrain, upgradeable motor, oil-filled shocks, clear body | Hobbyists with some experience, builders seeking customization |
| High-End Tier | High — 8 to 12 hours | Full mechanical assembly, ball bearings, adjustable suspension, pro-grade electronics | Experienced builders, enthusiasts who want tuning flexibility |
| Top-Tier | Expert — 12+ hours | Competition chassis, precision machined parts, advanced telemetry-ready electronics | Serious hobbyists, competitive racers, custom builders |
Essential Components of a Build-Your-Own RC Car
Understanding the role of each component will make your build smoother and help you troubleshoot any issues during assembly. Every RC car, regardless of tier, consists of several core systems that work together to deliver power, control, and durability.
🚗 Chassis & Drivetrain
The chassis is the structural backbone that holds all components together. The drivetrain transfers power from the motor to the wheels through gears, belts, or driveshafts. Entry-level kits often use plastic chassis, while higher tiers feature aluminum or carbon fiber construction for greater rigidity and durability.
⚡ Motor & Speed Controller
The motor is the heart of your RC car. Brushed motors are common in entry-level kits and are easy to maintain, while brushless motors in mid-range and high-end kits deliver superior efficiency and longevity. The electronic speed controller (ESC) regulates power delivery and must be matched to your motor's specifications.
🔋 Battery & Power System
Most modern kits use rechargeable battery packs, with lithium-based chemistry being the standard in mid-range and high-end tiers. The battery connector type and voltage rating must be compatible with your ESC and motor to avoid damage or safety hazards.
📡 Radio Transmitter & Receiver
The radio system allows you to control steering and throttle remotely. Entry-level kits often include a basic two-channel transmitter, while advanced kits may support multi-channel systems with adjustable endpoints, exponential curves, and model memory for multiple vehicles.
🛞 Suspension & Steering
Suspension components — shocks, springs, and linkage arms — determine how your car handles uneven terrain and corners. Builders in higher tiers can adjust dampening, ride height, and camber to fine-tune handling characteristics for different surfaces.
🛠️ Tires & Wheels
Tire compound and tread pattern dramatically affect traction and wear. Most kits include a set of general-purpose tires, but serious builders often acquire multiple sets for different surfaces, from loose dirt to high-grip carpet tracks.
Tools and Preparation Before You Start
Gathering the right tools before you begin assembly will save time and prevent frustration. Most quality kits include the essential tools, but having a few additional items on hand makes the process more efficient.
- Screwdriver set — Both Phillips and flathead in multiple sizes. Many RC kits use metric hex hardware, so a quality hex driver set is invaluable.
- Needle-nose pliers — Useful for holding small nuts, inserting pins, and bending linkage rods.
- Hobby knife — For trimming plastic flash, cutting decals, and preparing body shells.
- Soldering iron (optional) — Required for some advanced kits that involve soldering motor or battery connections.
- Small parts organizer — A compartmented tray or magnetic mat keeps screws and small components sorted during assembly.
- Work light and magnifier — Good lighting and magnification help with fine detail work, especially in the evening.
Step-by-Step Assembly Guide
While every kit has its own specific sequence, most build-your-own RC car kits follow a logical progression from chassis assembly to electronics installation and final body mounting. Here is a general roadmap that applies to most kits.
- Prepare your workspace. Clear a large, well-lit table and lay out a clean mat. Organize parts by the numbered bags or groups indicated in the manual. Have your tools within arm's reach and keep a small container for loose screws.
- Assemble the chassis and drivetrain. Follow the manual to build the main structural frame, install the gearbox or differential, and attach the drivetrain components. Pay close attention to the orientation of gears and bearings — a single reversed part can cause binding or premature wear.
- Install the suspension and steering. Attach the suspension arms, shocks, and steering linkage. At this stage, do not over-tighten any fasteners — you will want to make adjustments once the car is fully assembled. Check that all moving parts move freely without binding.
- Mount the motor and speed controller. Secure the motor to the motor mount and connect it to the ESC according to the instructions. Verify that the gear mesh between the motor pinion and spur gear is correct — too tight will cause excess heat and wear, while too loose will strip the gear teeth.
- Install the radio receiver and servos. Mount the steering servo and connect it to the receiver. Route the wiring neatly, keeping it away from moving parts and hot surfaces. Bind the transmitter to the receiver and test the steering direction before proceeding.
- Connect the battery and power system. Install the battery holder or tray and connect the battery to the ESC. If your kit requires soldering, double-check polarity before making any connections. Perform a low-speed function test to confirm that the throttle and steering respond correctly.
- Mount the wheels and tires. Attach the wheels to the axles and secure them with the provided nuts. Check that the tires are properly seated on the rims and that the wheel nuts are snug but not overtightened.
- Prepare and mount the body shell. If your body is clear polycarbonate, this is the time to paint it from the inside using polycarbonate-safe paint. Allow adequate drying time, then mount the body using the included clips or body posts. Add decals and details to personalize your build.
- Final inspection and tuning. Before the first drive, inspect all fasteners, check the steering alignment, and verify that the suspension moves smoothly. Perform a range check on the radio system and drive slowly on a flat surface to confirm that everything functions as expected.
Performance Tuning and Upgrades
Once your RC car is built and running, the next phase of the hobby begins: tuning and upgrading. Even entry-level kits can benefit significantly from thoughtful adjustments, and higher-tier platforms are designed with modularity in mind so you can grow your skills and the car's capabilities together.
Start with the basics: tire choice for your most common driving surface, shock oil weight, and gear ratio. A mid-range kit usually offers enough adjustability to experiment with these variables without requiring additional parts. As you gain experience, you can explore upgrades such as ball-bearing kits, adjustable turnbuckles, or higher-spec motors and speed controllers.
For those who enjoy the technical side of the hobby, building a build your own robot kit for adults is a natural companion project that shares many of the same skills — wiring, mechanical assembly, and controller tuning — while opening the door to programmable behaviors and advanced automation.
Ready to Start Your Build?
Explore our curated selection of build-your-own RC car kits and components below. Whether you are looking for an entry-level starter project or a top-tier competition chassis, the right kit is waiting for you.
VIEW RECOMMENDED KITSMaintenance and Longevity Tips
A well-built RC car can provide years of enjoyment if properly maintained. After each running session, take a few minutes to inspect the vehicle for loose screws, worn tires, and debris trapped in the drivetrain. Clean the chassis with a soft brush or compressed air, and periodically check the condition of bearings and gears.
- After every run: Check wheel nuts, inspect for visible damage, and remove dirt from the chassis and suspension.
- Every few sessions: Re-check gear mesh, inspect tire wear, and verify that all screws remain tight.
- Seasonal maintenance: Disassemble, clean, and re-lubricate bearings and drivetrain components. Replace worn tires and any damaged suspension parts.
- Storage: Store the car in a cool, dry place with the battery removed. This prevents corrosion and extends battery life.
Frequently Asked Questions
What skill level do I need to build my own RC car?
Most build-your-own RC car kits are designed for beginners and intermediate hobbyists. Entry-level kits require only basic tools and no prior experience, while mid-range and top-tier kits may require soldering or fine mechanical skills. Choose a kit that matches your comfort level and you will have an enjoyable build.
How long does it take to assemble an RC car kit?
Assembly time varies by kit complexity. Entry-level kits typically take 2 to 4 hours, mid-range kits 4 to 8 hours, and top-tier kits can take 8 to 15 hours or more, especially if painting or custom modifications are involved. Taking your time and enjoying the process is part of the experience.
What tools do I need to build an RC car?
Most kits include the necessary tools, but common additions include a screwdriver set, hex drivers, needle-nose pliers, a hobby knife, and optionally a soldering iron for advanced builds. A small parts organizer and good lighting are also highly recommended.
Can I upgrade a build-your-own RC car later?
Yes, most RC car platforms are designed for modular upgrades. You can typically swap motors, speed controllers, batteries, tires, and suspension components as your skills and interests grow. Higher-tier kits offer the most upgrade potential.
Is building an RC car suitable for kids?
Many entry-level kits are suitable for supervised children aged 10 and up, and they make excellent family projects that teach mechanical skills and patience. For younger children, consider children's toy cars or ready-to-run models that require less assembly.