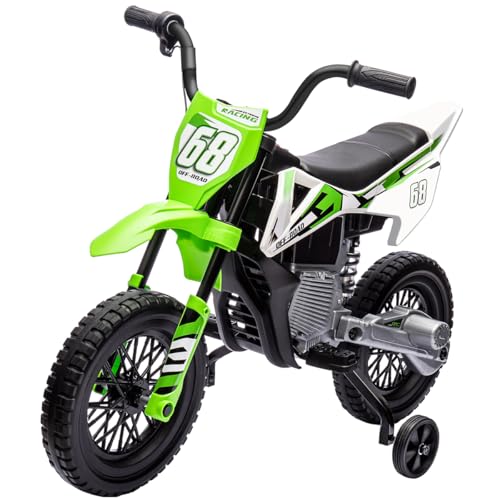
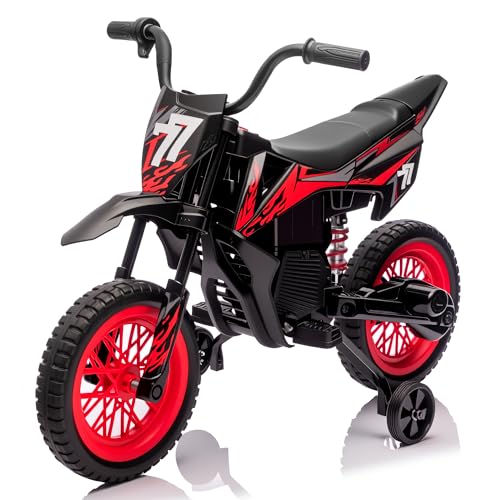
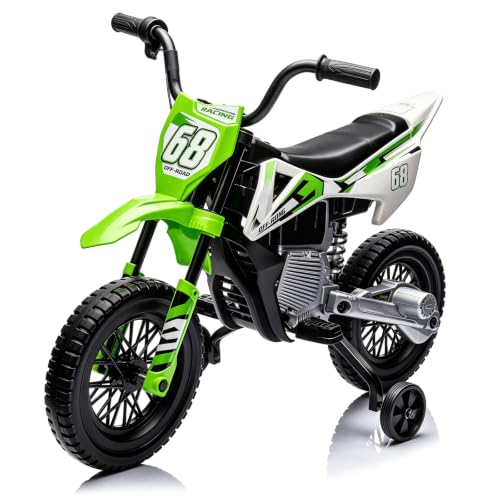
Electric Motorcycle with Training Wheels: The Confidence-Building First Ride
An electric motorcycle with training wheels gives young riders the thrill of two-wheeled motion with a safety net that eases the learning curve. This guide explains how these ride-ons work, what features matter most, how to keep kids safe, and how to choose the right model for your family's stage of riding.
Explore Top PicksWhy training wheels change everything: A traditional balance-first approach works well for pedal bikes, but an electric motorcycle has throttle response and motor torque that younger riders may not manage immediately. Training wheels provide lateral stability while the child focuses on steering, throttle control, and braking — the three skills that define safe riding. Once those are mastered, the wheels can often be removed for a natural transition to two-wheel riding.
What Is an Electric Motorcycle with Training Wheels?
An electric motorcycle with training wheels is a battery-powered ride-on toy styled like a motorcycle, equipped with a pair of auxiliary wheels mounted on a rear axle or frame bracket. These outrigger wheels keep the vehicle upright at low speeds and during turns, allowing a child to practice balance, coordination, and throttle modulation without the risk of a tip-over. Most models are designed for riders roughly three to eight years old, though sizing varies by brand and frame geometry.
Unlike a pedal bike, an electric motorcycle delivers motive power through a motor, usually controlled by a twist throttle or a push-button. Training wheels on these models serve a slightly different purpose than on bicycles: they are not just for learning balance but also for managing the higher center of gravity and the instant torque that small electric motors produce. For families exploring powered ride-ons more broadly, our guide to electric ride-on toys for 3-5 year olds offers useful context on age-appropriate power levels.
Key Components and How They Work Together
Understanding the anatomy of an electric motorcycle with training wheels helps parents evaluate quality and safety. The main systems are:
- Motor and drivetrain: Most models use a chain-driven or belt-driven rear wheel with a brushed or brushless DC motor. Entry-level models typically offer a single speed, while mid-range and premium models may include variable speed control or a low/high switch.
- Battery and charging: Sealed lead-acid (SLA) batteries are common in the essential tier, while lithium-ion packs appear in higher-end tiers for lighter weight and longer run times. Charging ports should be recessed and covered.
- Throttle and control: Twist-grip throttles mimic real motorcycles; push-button designs are easier for very young riders. A parental remote or speed limiter is a valuable feature on premium models.
- Training wheels: Look for wheels with sealed bearings, adjustable height brackets, and a wide stance. Metal brackets are more durable than plastic; some models allow tool-free removal for the transition phase.
- Brakes: Rear drum or disc brakes are typical. A handbrake lever sized for small hands is preferable to a foot brake for most young riders.
- Frame and bodywork: Steel frames with powder-coated finishes resist rust. Plastic body panels should be securely fastened and free of sharp edges.
Who Should Ride One? Age and Skill Considerations
Manufacturers typically label electric motorcycles with training wheels for ages three and up, but age alone is a poor guide. Consider these readiness signals:
- Physical readiness: The child can sit upright unsupported, reach the handlebars comfortably, and squeeze a brake lever. Feet should be able to touch the footpegs or floorboards.
- Cognitive readiness: The child understands "stop," "slow," and "turn" instructions and can follow a simple safety routine before each ride.
- Attention span: A rider who loses focus quickly may not be ready for a powered vehicle, even with training wheels. Short supervised sessions help build stamina.
For a broader view of ride-on options organized by age, see our collection of electric ride-on toys for 4 year olds and electric ride-on toys for 5 year olds. These pages help parents match vehicle size and power to developmental stage.
Safety Features That Matter Most
Safety is the deciding factor when choosing an electric motorcycle with training wheels. Prioritize these features:
- Speed limiting: A low-speed mode (often around 2–3 mph for beginners) is essential. Some models offer a parental remote that can cut power entirely.
- Sturdy training wheel brackets: Thin plastic brackets flex and break; reinforced metal brackets with lock nuts are the durable standard.
- Non-slip footrests and seat: Rubberized surfaces keep feet and seat position stable during turns.
- Smooth start-up: A soft-start motor controller prevents sudden jerks that can unseat a beginner.
- Battery safety: Look for batteries with overcharge protection and a charging port that cannot be accessed while riding.
- Helmet and gear: A properly fitted helmet is non-negotiable. Knee and elbow pads are strongly recommended for the learning phase.
For general powered ride-on safety guidance, our electric ride-on toys for 3 year olds page covers supervision ratios and terrain considerations.
Training Wheels vs. Balance Bikes: Which Path Fits Your Child?
Some families begin with a balance bike to develop two-wheel intuition, then move to a powered motorcycle. Others prefer the training-wheel route because the child can experience motorized riding immediately. Neither path is universally better. Training wheels suit children who are eager to ride powered vehicles but still developing core stability and throttle control. Balance bikes suit children who enjoy self-propelled motion and are not yet ready for motor power. Many families combine both: a balance bike for the driveway and a training-wheel motorcycle for supervised sessions on flat grass or pavement.
Terrain, Surfaces, and Riding Environment
Electric motorcycles with training wheels perform best on flat, smooth surfaces: paved driveways, short-cut grass, and rubberized playground surfaces. Avoid slopes, loose gravel, and wet pavement during the learning phase. Training wheels prevent tipping but do not improve traction; a rear-wheel-drive model on wet grass can still spin out. Check the manufacturer's recommended surface type — most entry-level and mid-range models are designed for hard, flat surfaces only.
Battery, Run Time, and Charging Realities
Run time varies by battery chemistry, rider weight, and terrain. Essential-tier models with SLA batteries typically deliver shorter sessions and take longer to charge; mid-range and premium models with lithium-ion packs offer longer run times and faster charging. A practical tip: buy a model whose run time matches your child's attention span, not the longest advertised figure. A 30–45 minute session is plenty for most beginners. Always charge in a cool, dry location and follow the manufacturer's charging window — overcharging shortens battery life.
Maintenance Checklist for Long-Term Use
- Check training wheel bolts and bracket tightness before every ride.
- Inspect tires for wear and maintain recommended pressure (if pneumatic).
- Clean and lubricate the chain or belt per the manual.
- Store the battery at partial charge if the vehicle will sit unused for weeks.
- Inspect the charging port and cable for fraying or corrosion.
- Tighten all visible fasteners monthly; vibrations loosen bolts over time.
For families managing a growing collection of ride-ons, our toy organization resources include storage ideas for larger powered vehicles.
How to Transition Off Training Wheels
When the child demonstrates consistent throttle control, confident braking, and steady steering, it is time to consider removing the training wheels. Choose a flat, grassy area for the first wheel-free sessions. Lower the seat if adjustable, and keep sessions short. Some models allow one training wheel to be raised slightly before full removal, creating a gradual weaning process. Expect a few wobbles; the goal is confidence, not perfection. If the child resists, return the wheels and try again in a few weeks.
Comparing Tiers: What You Get at Each Level
Electric motorcycles with training wheels fall into recognizable market tiers. Use this comparison to align features with your family's needs:
| Tier | Typical Features | Best For |
|---|---|---|
| Entry-level | Single-speed motor, SLA battery, basic plastic training wheel brackets, push-button throttle | First-time riders in the 3–5 age range on flat driveways |
| Mid-range | Variable speed or low/high switch, metal training wheel brackets, rubberized footrests, better brake lever | Riders aged 4–6 who ride frequently and need durability |
| Premium | Lithium-ion battery, parental remote or speed limiter, soft-start controller, adjustable training wheel height | Families who want long-term use and the smoothest learning curve |
| High-end tier | Brushless motor, disc brake, tool-free training wheel removal, realistic motorcycle styling | Older beginners (6–8) transitioning to two-wheel riding |
Common Mistakes Parents Make
- Skipping the helmet: Training wheels prevent tipping but not falls from loss of control. A helmet is mandatory.
- Starting on slopes: Even a gentle incline can overwhelm a beginner's braking skills. Start on flat ground.
- Overestimating run time: Advertised run times assume ideal conditions. Plan shorter sessions and charge between them.
- Ignoring bracket maintenance: Loose training wheels defeat their purpose and can cause instability. Check bolts before every ride.
- Removing training wheels too early: Wait for consistent control, not a calendar date.
Families exploring other powered ride-ons for older children may find our electric ride-on toys for 6 year olds and electric ride-on toys for 7 year olds guides helpful for sizing up.
Frequently Asked Questions
Are electric motorcycles with training wheels safe for a three-year-old?
Some entry-level models are designed for age three and up, but readiness varies by child. Look for a low-speed mode, a soft-start motor, and sturdy metal training wheel brackets. Always supervise and start on flat, smooth surfaces with a helmet and pads.
How long does it take to learn to ride with training wheels?
Most children develop basic throttle and brake control within a few weeks of short, regular sessions. The transition off training wheels depends on individual confidence; some riders are ready in a month, others need several months. There is no rush.
Can training wheels be removed?
Most models allow removal, often with basic tools. Premium and high-end tiers frequently offer tool-free removal. Check the manual for the specific procedure and recommended transition steps.
What surface is best for a beginner?
Flat, smooth pavement or short-cut grass. Avoid slopes, gravel, sand, and wet surfaces during the learning phase. Training wheels stabilize the vehicle laterally but do not improve traction.
How do I maintain the training wheels?
Check bolt tightness before every ride, inspect wheels for cracks or flat spots, and lubricate bearings if they become stiff. Replace worn wheels promptly; a wobbly training wheel undermines stability.
Do I need a parental remote control?
A parental remote or speed limiter is a valuable safety feature, especially for first-time riders. It lets you cut power instantly if the child loses control. Premium tiers often include this feature.
Final Thoughts: Building Confidence One Ride at a Time
An electric motorcycle with training wheels is more than a toy — it is a confidence-building tool that teaches throttle control, spatial awareness, and responsibility. The right model matches your child's physical size, offers dependable safety features, and is built to last through the learning phase and beyond. Start slow, supervise closely, maintain the vehicle, and let the child set the pace. When the training wheels come off, the skills learned on those early rides will carry forward for years.